After completing this project my truck went from having a variable, but not overheated temp, to stable. The heater works too, just in time for summer. I don’t think I will use acid routinely, but it seemed very effective for use every few years. The procedure I used is below.
TM 9-2320-212-20
9/16 in wrench(s)
1/2 in wrench(s)
Screwdrivers
Water distribution tube
Thermostat gasket (there are two, the housing base gasket, and the top of the thermostat has one inside the thermostat housing)
Bypass elbow gasket
Water pump gasket
Hoses/Belt if you need to replace those, I did in this project
2 ½ -5 lb Oxalic acid (2 ½ lb per flush)
2 ½ lb Washing soda (sodium carbonate)
2 ½ lb Borax
1. Drain the coolant using the drain cocks – Open the one on the front of the radiator first, to capture as much coolant as possible to reuse or dispose of properly. After its clear, open the drain on the engine block (near the oil filler tube) to finish. The drain cock on the engine block was jammed up with gunk on my vehicle, I had to lance it (gently) a few times with stiff wire to get it to drain. You can remove the whole drain cock with a 9/16 wrench to increase flow or clear obstructions.
I recovered the coolant, filtering it through a colander/tee shirt since it is less than a year old. Letting it sit a few hours/overnight lets anything not coolant settle to the bottom to be discarded.
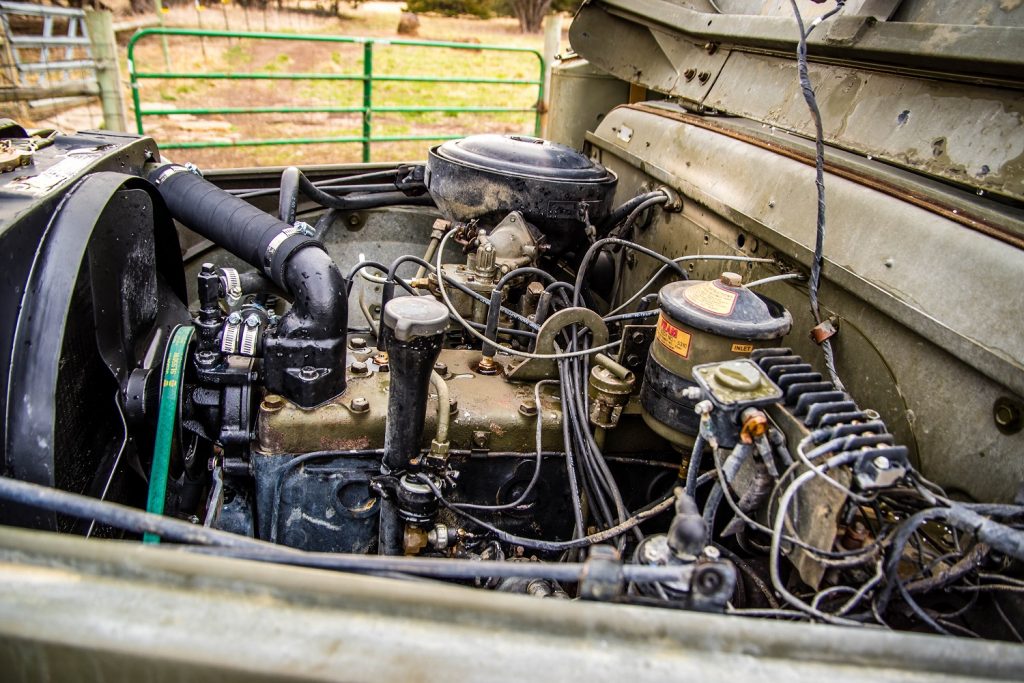
2. Remove the thermostat – This will ensure that any flush cycles through the system without obstruction and is straightforward to do, 2 9/16ths bolts are what holds it on. It takes some maneuvering to remove without gouging the thermostat, TM -20 page 2-118 illustrates this well, removing the bypass elbow simultaneously makes this easier if you have the gasket. For the flush cycles, I reused the old gaskets since minor leaks wont matter at this point.
3. Water Flush – I used a garden hose and set the flow to match the drain rate with the drain cock on the radiator removed, then ran the engine while closely monitoring to ensure the water level stayed full. This forces water to move through the system and exit the bottom of the radiator. I also alternated between radiator drain cock and block drain cock, but did not have the engine running while the block drain cock was open. I did this for about 10 minutes.
4. Acid Flush – I mixed 1 cup (about 8oz) of oxalic acid per gallon, and the cooling system capacity is 4.25 gallon – I mixed 4 gallons of this solution. The TM -20 page 2-116 mentions both aluminum chloride and oxalic acid, I could not find a source of aluminum chloride, nor a reference for its use in corrosion removal. I did find several references to oxalic acid in cooling system maintenance, so I used it by itself. I did 2 cycles of acid flush, driving the vehicle both times to bring up to running temp. Both cycles came out florescent green (much like antifreeze) which appears to be the color of rust dissolved in oxalic acid (ferric oxalate) – Cleaning with Oxalic Acid? Here’s What You Need to Know. – CORECHEM Inc. – All About Ferric Oxalate (bostick-sullivan.com)
5. Water flush – same as 3
6. Soap flush – same as 3 but with detergent (laundry or dishwasher to reduce suds). Not mentioned in the TM, but I have read several internet references on this and I imagine it would be beneficial to remove any oils that somehow remained after the above.
7. Neutralize – Washing soda (sodium carbonate), 8oz per gallon, running to circulate. The TM mentions Borax as an ‘inhibitor’, which I will use second to last flush before adding coolant when finished. Borax isn’t particularly PH basic (PH 9), and am not sure why the TM states to use it, but its cheap and more flushing can’t hurt.
8. Water flush – same as 3
9. Disassemble the cooling system – These steps are to get to the coolant distribution tube, which is apparently liable to get clogged and if it does cools unevenly. Uneven cooling would result in the front cylinder getting adequate cooling and the rear getting less as the water travels down the tube from front to back.
10. Remove tension from the belt – My truck gets belt tension from the alternator, loosening the tension bolt permits the belt to slip of the alternator. Evaluate the belt for replacement, I will replace mine.
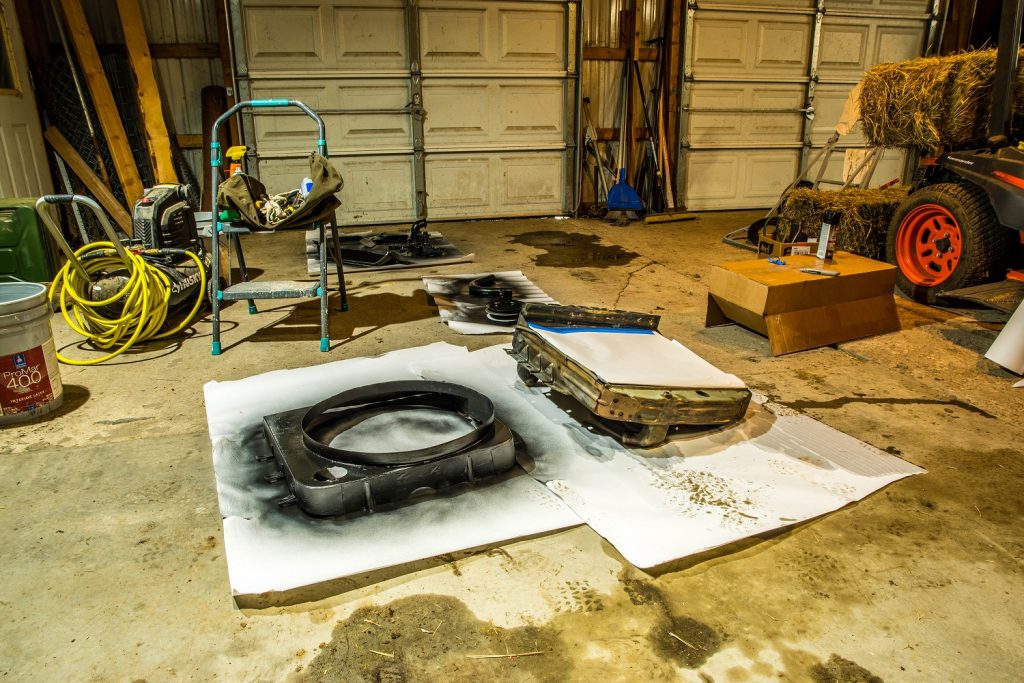
11. Remove the fan – its straightforward, using 4 1/2in bolts, this is illustrated on page 2-121. The spacer part will fall out as it isn’t attached to the fan or water pump. Be careful not to gouge the radiator when removing this.
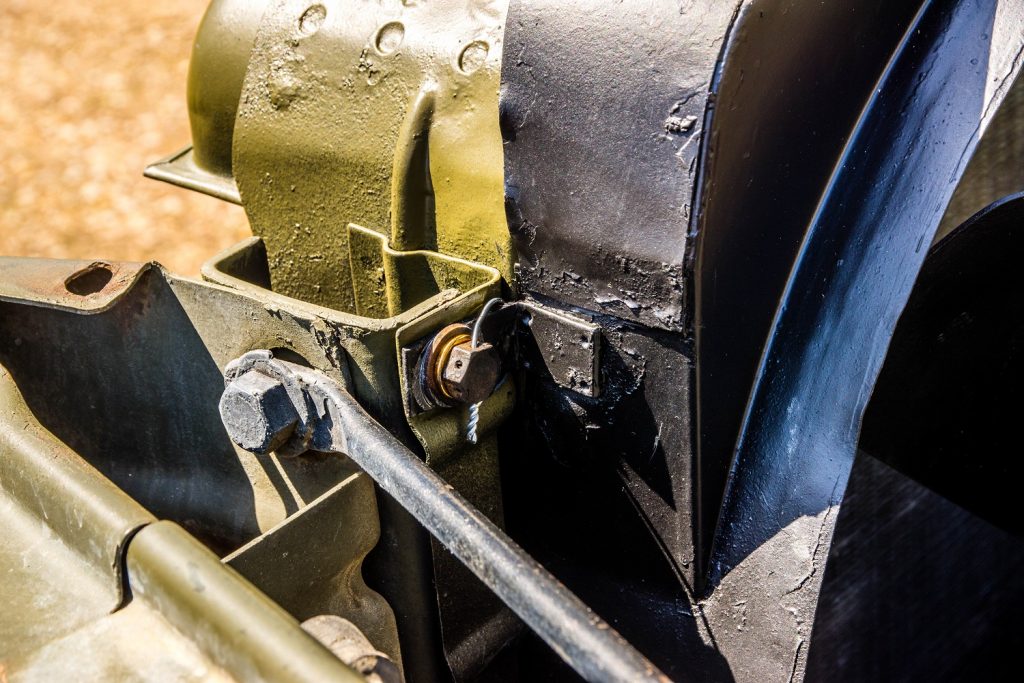
12. Remove the 6 radiator and fan shroud bolts – The bolts on my truck appear to have wire holes to prevent them from turning when installed, but no wire was installed. I used thin boards to support and cushion the radiator when it came loose as the last bolts were removed.
13. Remove the radiator hoses – Page 2-115 illustrates this well, there is the inlet and outlet hose/tubes. Evaluate them for replacement, I will replace mine.
14. Remove the shroud and radiator – Remove the fan shroud being carful not to gouge the radiator, then remove the radiator. It is possible to do this solo, but easier to do with two people.
15. Remove the water pump – there are three 9/16 bolts holding the water pump on, remove these and take off the water pump.
16. Remove/replace the water distribution tube – behind the water pump is the water distribution tube, remove with a tool from Vintage Power Wagons http://www.vintagepowerwagons.com/ (Part #NTP211), I replaced with the Vintage Power Wagon stainless steel tube Part #CC637432. I flushed out the empty water distro tube channel using a hose attachment/wand that got me to the rear of the block to flush things out instead of spraying debris further in.
17. Clean the system surfaces – gasket interfaces, hose connections, and other parts all were thoroughly cleaned (washed and wire wheeled where needed). I spray painted the fan shroud and tubes with black engine paint, and the radiator body (not cooling tubes) with green paint from Army Jeep Parts – Gillespie Coatings Paint | Military Paint | Army Jeep Parts
18. Flush the radiator – My radiator overflow pipe (the small tube from filler neck to the bottom of the radiator for overflow fluids to exit) had been clogged, causing coolant to spray all over the engine from time to time. Solving this issue was fairly easy, I used electric fence wire to lance the tube, clear the blockage, then flush it out. The radiator itself benefited from being able to tilt from side to side, dislodging more debris in the bottom and flushing it out with a hose. Use caution and don’t batter the radiator while doing this.
19. Install the radiator and fan shroud – Use thin boards to cushion the radiator as it is placed. I wired my radiator bolts so they wouldn’t loosen, but it seemed fine without it. The bolts are drilled for wire, so it seemed like it should be done. I used electric fence wire, which should be durable and not prone to corrosion as it is made to be in the weather. I have no idea if this tie is correct, but I assume it will prevent the bolt from turning.
20. Install water pump – using a thin coat of sealant on both sides of the gasket, replace the water pump and gasket
21. Put the belt in place
22. Install the fan and fan drive pulley, orchestrating all this is tricky with the space available, but possible with patience.
23. Tension the belt – Page 2-120 details tensioning the belt, which states 1/2in deflection – “Deflection” seems to be space you can push down on a belt as described here – https://www.bestorq.com/library/techinfo/whytension.pdf. Ill probably need to use the ruler method described here https://www.acepumps.com/en/index.php?/site/applications/C38/Adjustment as I do not have the specific tools available.
24. Install the thermostat, inlet/outlet hoses, and heater hoses if you have those. The bypass elbow and thermostat housing have to be installed together, there isn’t enough hose between them to maneuver the thermostat in place otherwise.
25. More flush cycles, Borax then water. Check for leaks and test drive.
26. Fill with distilled water and antifreeze and bring to temp to ensure its mixed well