I have seen a few people recommend a Raspberry Pi as a ham radio computer/controller, notably Off Grid Ham Radio OH8STN, at least in the past. Having incorporated a Raspberry Pi4 in my setup for a few years, I find they are well suited for this.
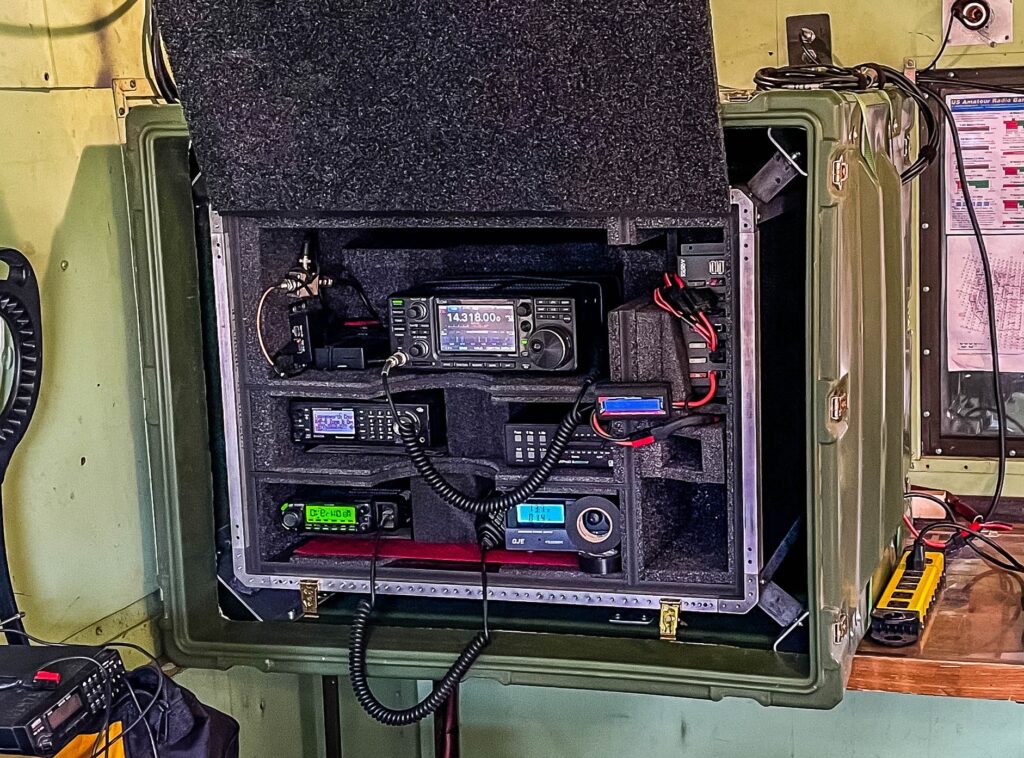
My setup is a Pi4, powered by a large 12v battery (Duracell deep cycle gel type) connected to a 12v to USB-C (60w) device from Coolgear. I use the device from Coolgear since standard USB power seems to be to little to drive the Pi, it frequently indicates low power unless I use the Coolgear device which provides higher wattage. The battery will keep the Pi alive for at least a couple weeks and can be charged by solar or using a 12v charger. The Pi gets time from a u-Blox7 USB GPS receiver, since Internet access is not usually available at places I camp and time, at least the seconds portion, is important to digital modes. The GPS receiver is in a PVC pipe outside the truck and can be seen at the top right, the GPS does not work in the metal enclosed truck. This Pi connects to the IC7300 and I have rig control and access to digital modes from the Pi. I use VNC (Virtual Network Computing) to then operate the Pi from a regular computer, or even old IPads. Since the Pi can operate as a WiFi hotspot of sorts, albeit without internet, I can VNC from anywhere in the vicinity, even a cot in the tent away from the radio.
The advantage of using a Pi is its very low power draw allows sessions to be sustained without interruption for days, much longer than I would ever operate POTA. If my display computer runs out of battery, I can charge it without losing track of received messages. I generally just let the Pi run for the entire trip without having to worry about it, ill just VNC whenever I want to use it. The Pi is also incredibly inexpensive; I got a kit from Vilros for about 60ish dollars that came with a very nice metal case.
A disadvantage of the Pi is that it isn’t a very fast computer, but it is just fine for handling digital modes. A variety of logging software I have tried lags though, enough to hinder fast moving activations. I generally log on a regular computer to log contacts. I have been using HAMRS for logging.
My preferred digital mode is JS8 using the software JS8Call. I do enjoy voice contacts, but voice is a bit difficult for me with my howitzer hammered hearing. Digital modes allow me to make contacts without having to depend on my ears. JS8Call uses signaling that is stated to be effective even at low signal levels, and this seems to be true in my experience. I like the idea of being able to pick up even faint stations. JS8 isn’t a very fast protocol, and it isn’t a very good choice for racking up log entries, but usually I am not after numbers for POTA or contests anyway, I am more focused on what can I get my equipment to do. For most POTA trips or contests I’ll try to log at least a handful of JS8 log entries.
My Method of setting up a Pi as a radio controller
- Install the Pi Operating System
- Use the AmRRON setup script to install radio specific applications
- Resolve problems with JS8Call
- Connect the radio using FLRig, resolve audio connections and audio levels for JS8Call
- Set up time with GPS and Chrony
- Add final add on applications
Installing the Pi OS (Bookworm)
Any computer that is updated over time, adding and removing software, gathers some unwanted stuff laying about. Every year or two, I start with a fresh install of the current Pi software, beginning with the Raspberry Pi Imager. I have a computer monitor that I use to get the Pi off the ground after first boot, VNC is not turned on by default. You have to turn on VNC using raspi-config or using the “Raspberry Pi Configuration” under preferences after you boot up. Turn on SSH as well.
Raspberry Pi wants you to use the “Raspberry Pi Connect” application, but it requires a login with it’s service and gives global access to your Pi, which I don’t really want or need for this application. RealVNC Viewer works to access a Pi with VNC active. If you have trouble getting a VNC session to display, try other video modes using the “Screen Configuration” app under preferences in the Pi GUI. From here, do a standard update; the Pi has an icon in the top right indicating updates are available and choosing to install updates takes care of this process for you. After this the base OS is ready. It may be a good time to backup what is completed so far using the SDCard copier under accessories, you will need a second micro SD Card to make this backup.
I have found that while RealVNC server (the previous default VNC server on the Pi) was very stable, the new wayvnc server that is stock with the Pi sometimes flakes out. To restart it, SSH (PuTTY is free) to your PI and use:
- run – sudo systemctl restart wayvnc
Install Radio specific applications with AmRRON setup scripts
To then install the software, there is a tool created by AmRRON that largely automates the installation process. You can find this tool at AmRRON setup-scripts where you can also find a very helpful guide on using this tool. I haven’t used all the applications it installs, but I am primarily interested in FLRIG, as the interface to the radio; JS8Call, as the digital mode software I use most often; and Fldigi, a program that gives access to a large number of various digital modes. I also occasionally use WSJT-X to see what I can reach given my equipment and location. I do need to make time to explore the other tools it installs, such as the packet radio applications. This install script take quite awhile to run, so be prepared for an hour or two of watching compile screens. This set of scripts also states it is written specifically for Linux Mint, so some software needs help, specifically JS8Call more often than not.

For a variety of reasons, some installations may fail. Note them and reattempt them. I have found that the servers where this software comes from have temporary problems which is the most common problem, except JS8Call. With the exception of JS8Call, all the failed applications in the screenshot above worked on a retry. JS8Call often has issues with installing on the Pi OS, and every time it is software dependency that is the cause.
Resolve problems installing JS8Call
The official JS8Call install instructions to build JS8Call from source code located at js8call/INSTALL at main · js8call/js8call · GitHub also fails due to unmet dependencies, but this may change over time so it is worth trying.
To resolve the reoccurring issue with JS8Call on the Pi at least one potential method is the article at Building js8call and wsjtx under Raspberry Pi OS – Bullseye. To summarize the article:
- run – sudo nano /etc/apt/sources.list
- uncomment (remove the # symbol) from the last lines beginning with #deb-src like below. Use control-o to write the file and control-z to exit. The article references the previous version, “bullseye” but the Pi is (currently) on “bookworm”. This change permits the Pi to access expanded libraries of software

- run – sudo apt update
- run – sudo apt upgrade -y
From here, I tried the compilation method detailed in the article, which does work and installs version 2.1. You can skip the Hamlib sections as the AmRRON script will have already installed this. I would rather have the more recent version vs 2.1, however. I did find a method at How do I install a .deb file via the command line? to attempt the version currently listed at files.js8call.com/latest.html, which is version 2.2. It also fails dependencies, but using the following:
- run – sudo apt-get install -f
- run – sudo dpkg -i js8call_2.2.0_armhf.deb (after downloading this .deb file, and using cd to go to the directory its located in. Change the file name if the version number changes)
This finally worked for version 2.2 on a Raspberry Pi Bookworm. The packages will catch up eventually, but Raspberry Pi often seems to have difficulty with standard JS8Call install packages when the Pi bumps versions. I have more often than not had to spend significant time getting it installed, but with JS8Call being my favorite digital mode, it is worth the hassle.
Setting up FLRig and audio levels
I found setting the audio levels when I first started digital modes very difficult. It took me quite a while to figure out why I couldn’t receive, and when I finally could receive, why I couldn’t be heard.
FLRig is a great program that acts as an intermediary between your radio and the various software that accesses your radio, at least for ‘rig control’.
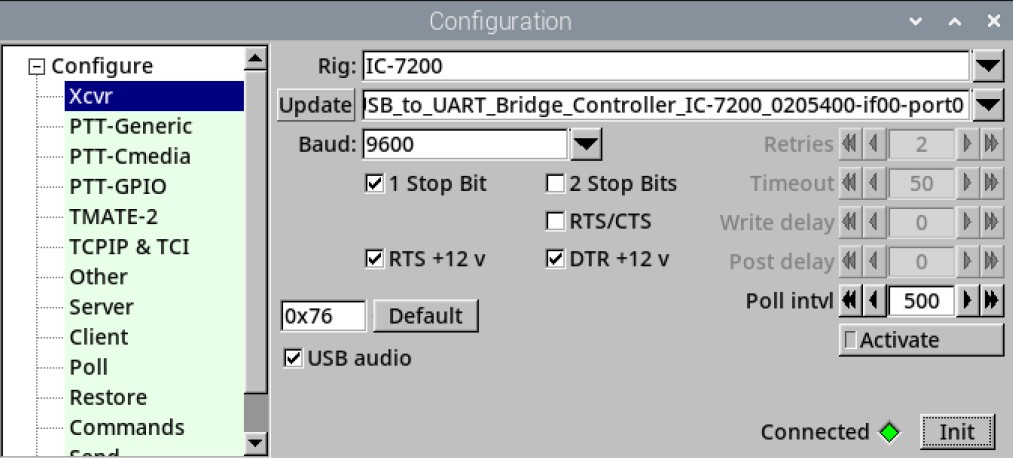
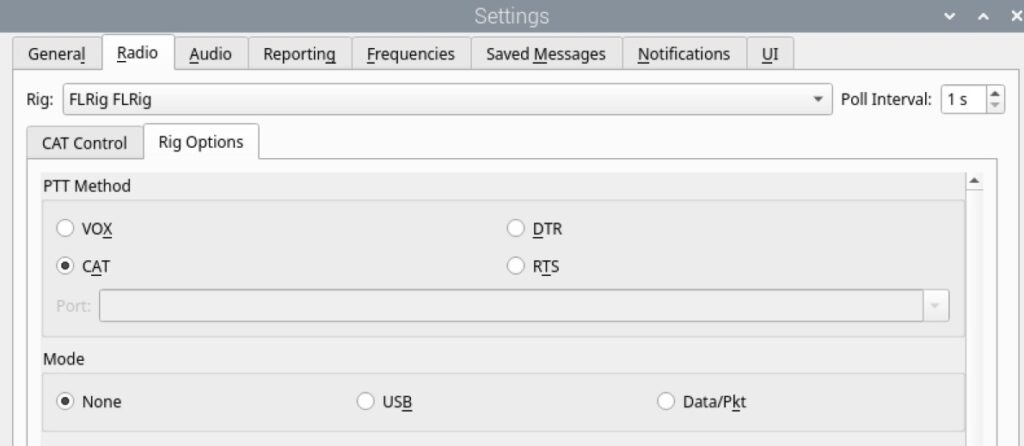
After connecting the radio to the Pi with USB (or whatever your radio model uses) you can run FLRig and see if you can get connected to it. The documentation for FLRig is flrig_help: IC-7300 Setup, and there are pages for various radios. I am using an IC7200 in this example, but the setup for a 7300 is similar, you may have to mess with Baud. Use a faster baud if it works for you:
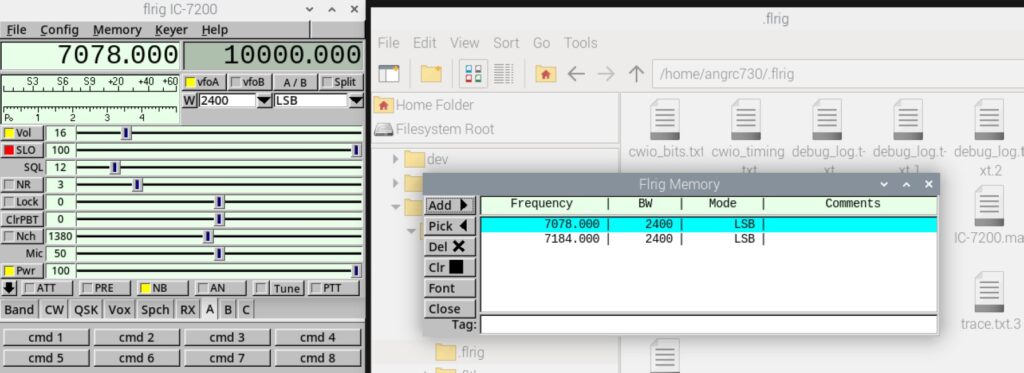
You can also have a directory of frequencies and modes saved to quickly jump between these. When initially setting at a POTA campsite I normally monitor 2.5, 5, 10, 15, 20 Mhz from Radio Station WWV | NIST to get a sense of what bands might be doing well and to get audio feedback that my antenna and radio are working. Having these frequencies saved in FLRig makes it easy to switch between these. This directory of frequencies is per radio and the file that contains these frequencies often gets eaten so I have made a habit of saving this file elsewhere. It is located in the Pi’s home directory /home/.flrig by default and the file ends in .mat. I have an IC7200 and IC7300 so FLRig has a different .mat file per radio, but I can simply paste the contents of one radio’s .mat file into another. the .mat file wont be created until you save a random frequency using the memory menu and then exit FLRig like below:
Below is an example .mat file (for specifically an IC7200):
580000 2 39 "WIBW"
710000 2 39 "KCMO"
1440000 2 39 "KMAJ"
21078000 7 34 "JS8Call 15M"
24915000 7 34 "FT8 12M"
24920000 7 34 "PSK 12M"
24922000 7 34 "JS8Call 12M"
25000000 2 44 "WWV"
28074000 7 34 "FT8 10M"
28078000 7 34 "JS8Call 10M"
28120000 7 34 "PSK 10M"
50290000 7 34 "PSK 6M"
50313000 7 34 "FT8 6M"
50318000 7 34 "JS8Call 6M"
You may have to massage this file if moving it from one radio to another, which is easier than recreating it from scratch for each radio. The (sparse) documentation is here flrig_help: Memory Dialog, but the basic jist is the first number is the frequency, the second is a radio specific mode, and the third is a radio specific bandwidth. I just copy this file from one radio to another, save an example, eg a data mode, then use the data from it to modify the rest of the list. I keep a large list of various frequencies, voice and data, so I can easily switch from one to another with FLRig.
Once you get FLRig working, you can tell its working if you tune the radio and the FLRig display matches the radio, you can start working on the audio.
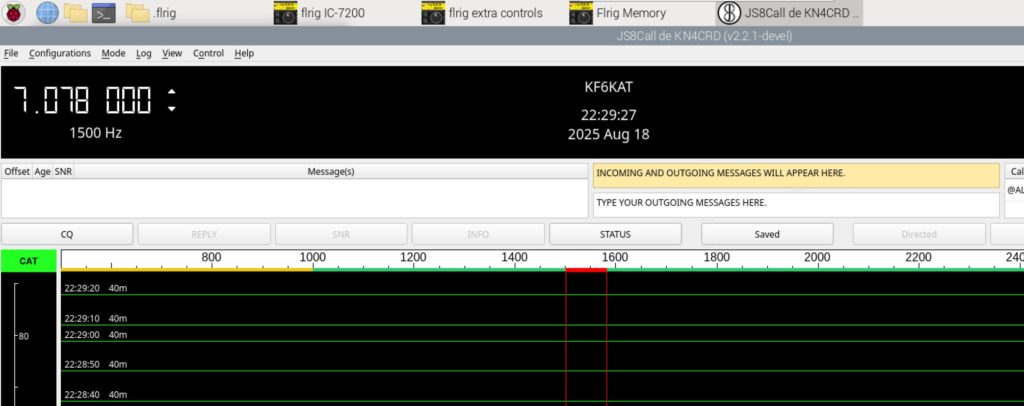
When you first run a digital mode software, in the above example, JS8Call, it will not display an audio waterfall. You have to figure out what input and output audio source to use. For a Pi and 7200/7300 combo it seems to consistently be:

If the audio receive is working you will see an audio waterfall:

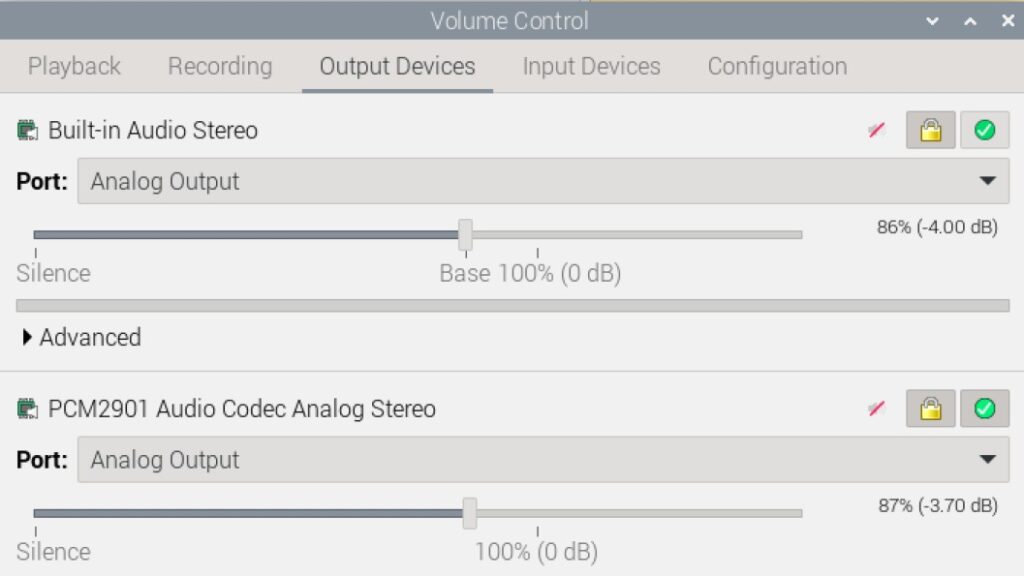
For the next part – the transmit, keep your power low and find a quiet spot on the airwaves. You will have to transmit to find the optimal output audio level. The AmRRON install script offers PulseAudio as the Pi audio levels application and I have found it to be straightforward. You will need to pay attention to the output power of your radio, which should be greater than none and close to the power level you selected.
You also need to pay attention to ALC (automatic level control). The summary of the ALC feature of some radios will attempt to compensate for being overdriven (to much audio input) and this distorts your signal and potentially signals nearby. A good article discussing this can be found at Clean Up Your Act! Proper digital mode level adjustment in Windows 10 – West Mountain Radio. Although it covers Windows, the concepts will be the same for the Pi and PulseAudio.
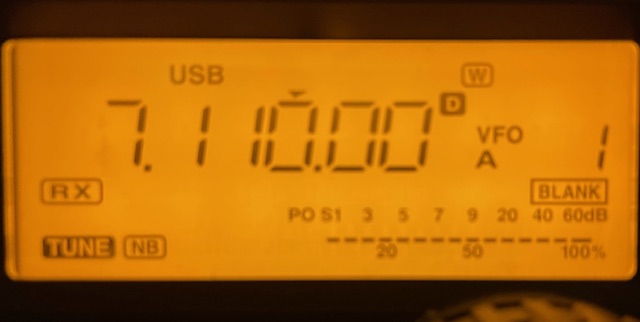
For an IC7200/7300, and other radios I assume, make sure you are set (on the radio) in a digital mode. The “D” to the right of the frequency indicates the 7200 is in a digital mode.
Start with a lower output using PulseAudio:
Use the SNR or CQ to test the output – use halt after you get a result:

If your audio from the Pi is driving the radio, you will get power out on the PO (power out) meter:
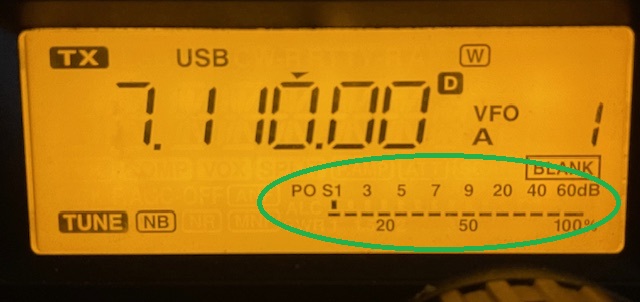
If you aren’t matching the output you selected on the radio with what is actually being transmitted, increase the volume in PulseAudio until you are. Eg if you selected to output 20 watts, you should be getting at or close to 20% on the PO meter.
Next is ALC, on the IC7200 you can long press the “ANF METER” (top right) button to select the various meter modes.
With your Pi audio driving the radios transmit, keyed up using the CQ or SNR buttons in JS8Call observe the ALC meter. Ideally, it will show nothing, but it can safely bounce on the first notch:
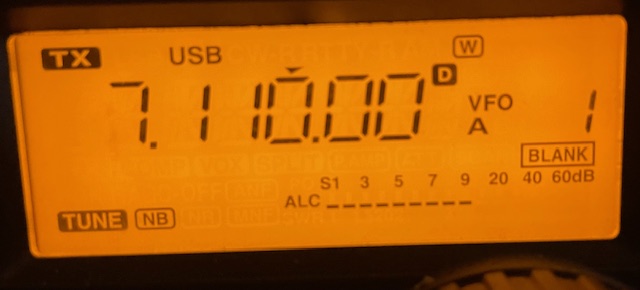
From here you can attempt a QSO on the various JS8Call frequencies listed at JS8Call | The official site for JS8Call
This is an overview covering specifically the Pi and a 7200. For a more detailed document see JS8Call-Guide.pdf, a high-quality reference from the author of the JS8Call software, Jordan Sherer KN4CRD. There is also a video featuring the author explaining, setting up, and using JS8 at JS8Call Setup and Demonstration by Jordan, KN4CRD
Time, at least seconds, is important to JS8Call as it frames all its signals in intervals. The Pi does not have an internal clock and will drift wildly if you don’t give it time from somewhere. By default, the Pi OS assumes you have internet access, and it gets time from NTP over the internet. If you don’t have access to the Internet to get the Pi time, you will have to set it fairly precisely manually or use a GPS to get time. There are also hardware clocks that you can get for the Pi, but I have not tried them.
A GPS Device and Chrony, a Network Time Protocol (NTP) client
I am using the Ublox7 USB GPS devices. They are very inexpensive, and I haven’t had one fail in the last several years. Since it is USB, I can run the GPS device outside of my vehicle, which is critical since the GPS signal is weak. Any GPS device that can connect to the Pi should work for time, but ill detail my setup.
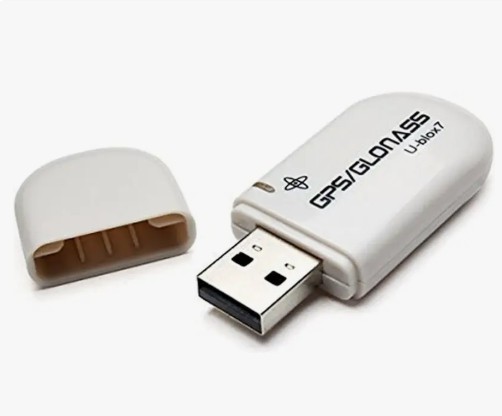
The first challenge is figuring out what port name is given to your GPS. If it is USB, I have used this method:
- sudo apt install gpsd gpsd-clients chrony
- Plug in the UPS GPS
- Use gedit or some other text editor to create a script, I called mine usbfind.sh
- Run – gedit usbfind.sh
- Paste the below script into this new file (this suggestion found at Stack Exchange)
#!/bin/bash

for sysdevpath in $(find /sys/bus/usb/devices/usb*/ -name dev); do
    (
        syspath="${sysdevpath%/dev}"
        devname="$(udevadm info -q name -p $syspath)"
        [[ "$devname" == "bus/"* ]] && exit
        eval "$(udevadm info -q property --export -p $syspath)"
        [[ -z "$ID_SERIAL" ]] && exit
        echo "/dev/$devname - $ID_SERIAL"
    )
done- run – chmod +x usbfind.sh (to permit this new script to run)
- run – ./usbfind.sh
In my case the GPS was – /dev/ttyACM0 – u-blox_AG_-www.u-blox.com_u-blox_7-_GPS_GNSS_Receiver, the important part being /dev/ttyACM0
- run – sudo gedit /etc/default/gpsd
# Devices gpsd should collect to at boot time.
DEVICES="/dev/ttyACM0"
# They need to be read/writeable, either by user gpsd or the group dialout.
# Other options you want to pass to gpsd
GPSD_OPTIONS="-n"

# Automatically hot add/remove USB GPS devices via gpsdctl
USBAUTO="true"

START_DAEMON="true"- run – sudo usermod -a -G dialout *yourusername* (add your username to the group dialout, change *yourusername* to whatever your username is)
Some suggestions above are from Millisecond accurate Chrony NTP with a USB GPS, Set up GPSD with U-blox7 GPS Dongle on Linux, and Using NTP on Linux with Chrony – Pi My Life Up, NTP for Raspberry Pi with GPS PPS in 2025
Important commands to use to verify your GPS is working, and to have it adjust time if you are not connected to the internet
- run – chronyc sources (this will tell you where your Pi is getting time from, NMEA should be listed if the GPS is working)
- From chrony documentation:
- ^ means a server
- = means a peer
- # indicates a locally connected reference clock.
- + indicates acceptable sources which are combined with the selected source.
- – indicates acceptable sources which are excluded by the combining algorithm.
- ? indicates sources to which connectivity has been lost or whose packets do not pass all tests. It is also shown at start-up, until at least 3 samples have been gathered from it.
- x indicates a clock which chronyd thinks is a falseticker (i.e. its time is inconsistent with a majority of other sources).
- ~ indicates a source whose time appears to have too much variability.

- run – cgps (this will show what satellites are being tracked and signal strength of those. use ctrl-c to exit)
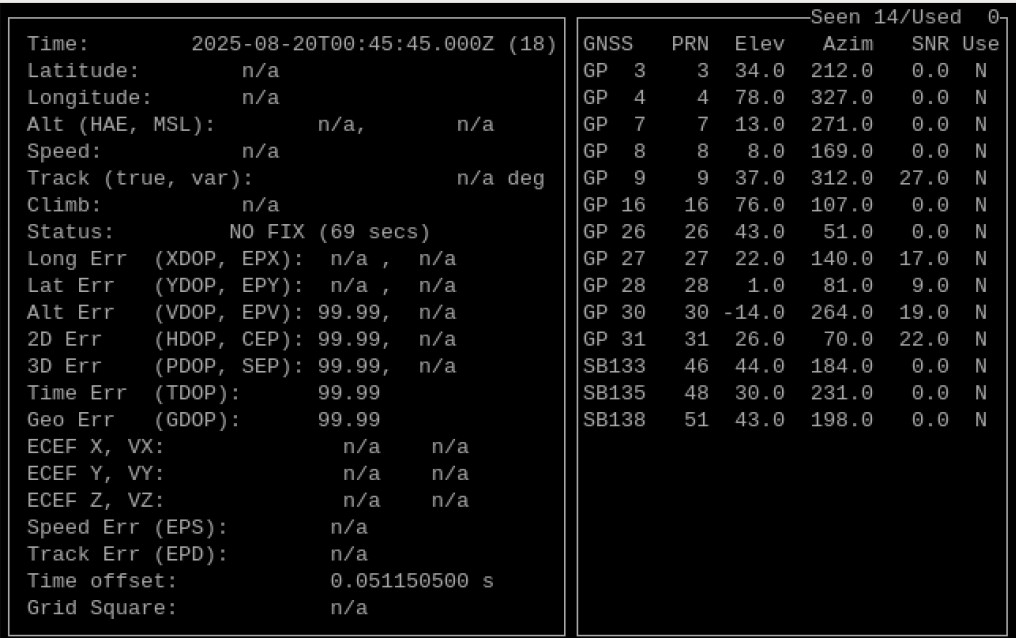
- run – sudo chronyc makestep (this tells chrony to adjust the time in a bigger step. I often have to run this many (many many) times to get the clock correct if the Pi has been turned off)
- Note – digging into this, I found chrony – chrony.conf(5) documentation on the configuration of chrony. The item of interest is the makestep configuration line there. One concept at play is slewing – time software avoids making large time jumps since this has bad side effects on normal systems (reference – NTP and Slewing). A potential solution would be to set the chrony.conf makestep option allow several more large time jumps rather than the default 3. Since the Pi does not have a clock, its time will always be wildly off when it first turns on and has no internet.

Conky, a system monitor and information display
The AmRRON script includes Conky, which displays information about the system and other things that you include. I modified time to show my local time zone, and most importantly, where I am getting time from. If it is my GPS, it will show NEMA as a time source.
The AmRRON install script will not autoload conky on startup on the Pi. To do this on Bookworm add a file in /etc/xdg/autostart with the following contents
[Desktop Entry]
Type=Application
Name=conky
Comment=run conky --pause=10
NoDisplay=false
Exec=/usr/bin/conky
A potential method would be to run the GUI file manager as root:
- run – sudo pcmanfm
Copy one of the files that is close to the contents above (I used env_display.desktop) and rename it to conky.desktop. then use
- run – sudo gedit
to open, and edit the conky.desktop file to include the contents above.
You can edit the configuration file, located in your home directory, called .conkyrc
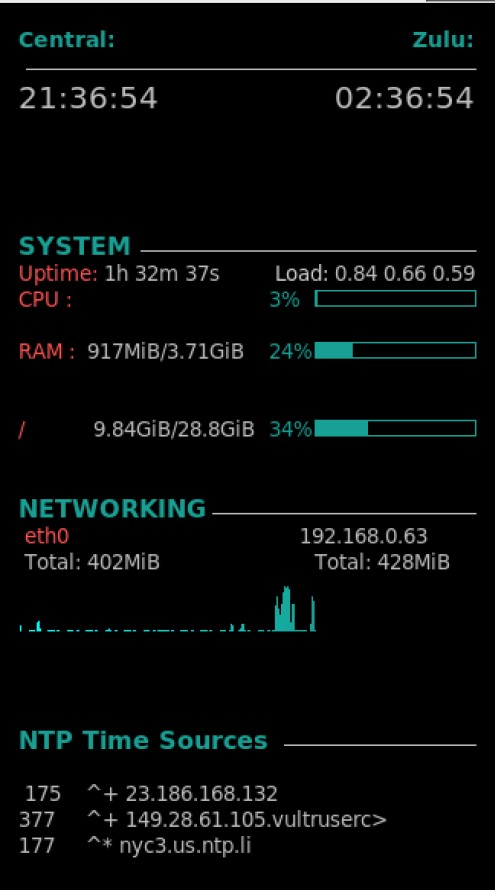
You can add the NTP time sources using this snippet in the .conkyrc file after you add the chrony services
${color1}${font Roboto Mono:style=Bold}\
NTP Time Sources$color$font $hr
${color grey}${execi 30 chronyc sources | awk 'NR>2{print $5"\t",$1,$2}'}
Web server and mediawiki as a notes/documentation place
One practice I have done is installed a webserver and mediawiki to keep notes on my items, link things like user manual .pdf, and whatever else I want. This isn’t needed to operate a Pi as a radio controller, but it is handy. I may cover this topic at a later date since I find having a wiki useful.

